
A light switch that refuses to turn on can disrupt your daily routine and signal underlying electrical issues that demand attention. Whether you’re dealing with a faulty dimmer, a tripped circuit, or a loose connection, knowing the right troubleshooting & repair tips can help you identify the problem quickly and decide whether it’s a simple fix or time to call a professional electrician.
This comprehensive guide walks you through safe diagnostic steps, common switch failures, and proven solutions that Chicago-area homeowners can tackle confidently. We’ll also clarify when electrical work requires professional expertise to protect your home and family from potential hazards.
What Should You Check Before Touching Any Electrical Switch?
Always turn off the circuit breaker and verify that power is off using a non-contact voltage tester before touching any electrical switch. Working on live circuits can cause serious injury or death, so proper safety protocols are non-negotiable.
Essential Safety Precautions
Electricity doesn’t give second chances. Before attempting any electrical work:
Identify and Turn Off the Correct Breaker: Locate your electrical panel and switch off the breaker controlling the affected circuit. If breakers aren’t labeled clearly, flip switches one at a time while someone monitors the light.
Verify Power Is Off: Never assume the power is disconnected. Use a non-contact voltage tester on the switch, outlet, or fixture before proceeding. This inexpensive tool can save your life.
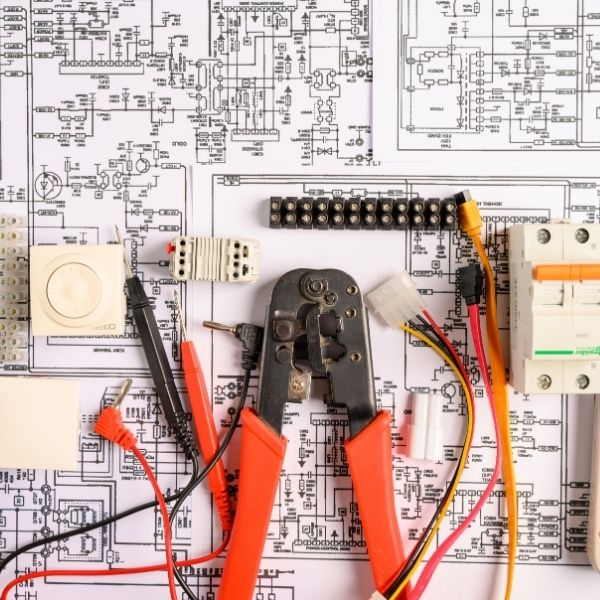
Use Proper Tools: Quality insulated screwdrivers, wire strippers, and pliers designed for electrical work prevent accidental shorts and provide better control during repairs.
Understand GFCI Protection: Kitchens, bathrooms, garages, unfinished basements, and outdoor areas require GFCI protection. If an upstream GFCI trips, downstream switches and outlets lose power even though their breakers remain on.
Know When Permits Are Required: Chicago and surrounding suburbs require permits for new circuits or relocated wiring. When renovation involves more than simple device replacement, consult a licensed electrician about permit requirements.
Why Won’t My Light Switch Turn On?
The most common reasons a light switch won’t work include tripped breakers, failed GFCI outlets upstream, burnt-out bulbs, loose wire connections, or a defective switch mechanism. Systematic troubleshooting identifies the actual cause quickly.
Start With the Simplest Solutions
Before dismantling switches or calling for help, eliminate obvious culprits:
Test the Light Bulb: Remove the bulb and test it in a working lamp, or install a known-good bulb in the problematic fixture. Failed bulbs are the most frequent “switch problem” that isn’t actually a switch problem.
Inspect the Fixture: Recessed lighting contains thermal protection switches that shut off when cans overheat. Allow 15-30 minutes for cooling, then test again. Check fixture sockets for corrosion, damaged contacts, or flattened center tabs that prevent bulbs from making proper electrical contact.
Check Ceiling Fan Configurations: If a ceiling fan light won’t illuminate but the fan blades spin normally, verify that pull chains are in the correct positions. Many fans use separate circuits and switches for light and motor functions.
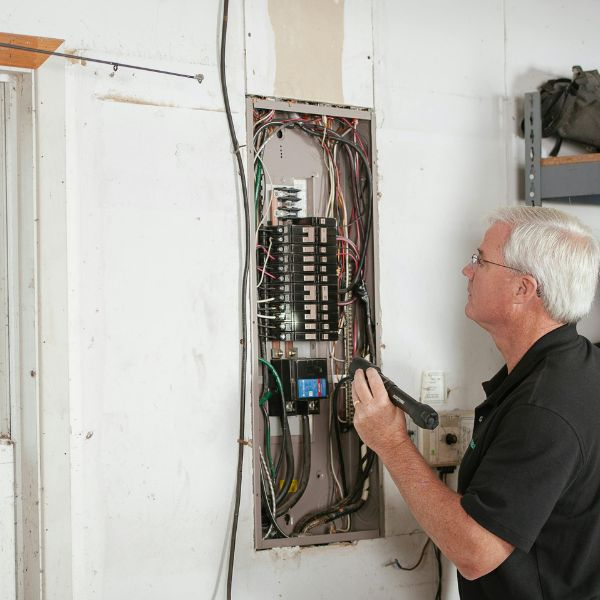
Check Your Electrical Panel and GFCI Outlets
Power interruptions upstream cause switches to appear dead when the actual problem lies elsewhere:
Locate Tripped Breakers: A tripped breaker sits between the ON and OFF positions. Turn it fully OFF, then back ON. If the breaker trips immediately upon reset, stop—you likely have a short circuit requiring professional diagnosis.
Reset GFCI Outlets: Kitchens, bathrooms, garages, and outdoor areas often feed multiple outlets and lights through a single GFCI. Locate every GFCI receptacle in these areas and press the RESET button. One tripped GFCI can disable multiple downstream devices.
Consider AFCI Breakers: Modern homes use arc-fault circuit interrupters for living spaces. These sensitive breakers protect against fire hazards but occasionally trip due to damaged cords, loose connections, or aging wiring that warrants professional evaluation.
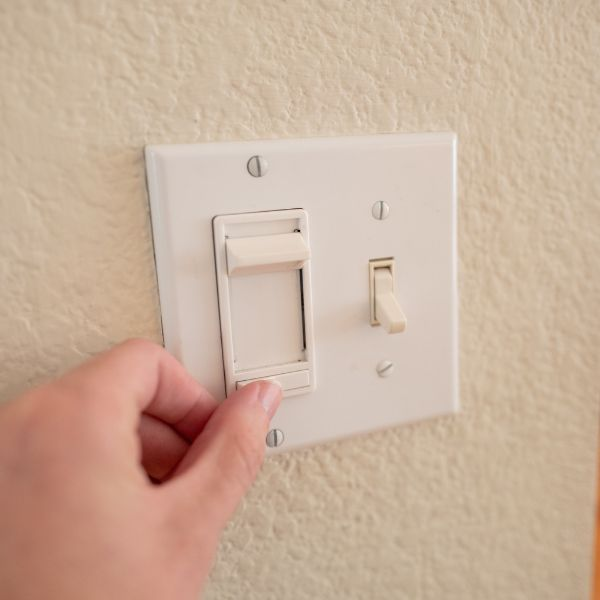
How Do You Identify Different Switch Types?
Single-pole switches have two terminal screws plus ground; 3-way switches have three terminals plus ground and allow control from two locations; 4-way switches have four terminals and enable control from three or more locations. Identifying your switch type prevents dangerous miswiring.
Understanding switch configurations helps you troubleshoot effectively:
Single-Pole Switches: The most common residential switch controls one light from one location. Simple two-wire circuits make these straightforward to diagnose and replace.
3-Way Switches: Two switches controlling the same light use three-wire circuits with travelers connecting the devices. The common terminal (typically a darker screw) distinguishes itself from traveler terminals.
4-Way Switches: Required when three or more switches control a single light, these intermediate devices sit between two 3-way switches. Rarely used in modern homes but common in hallways, stairways, and large rooms.
Dimmer Switches: Available in single-pole and 3-way configurations, dimmers fail more frequently than standard switches, especially when used with incompatible LED bulbs or after power surges.
What Are the Most Common Switch Connection Problems?
Loose back-stabbed wire connections, worn internal contacts, heat-damaged components, and incorrect wiring cause most switch failures. Fixing these issues requires basic electrical knowledge and proper safety precautions.
Diagnosing and Repairing Connection Issues
After confirming power is off and removing the cover plate:
Inspect Wire Connections: Back-stabbed connections (wires pushed into holes on the switch back) loosen over time, causing intermittent operation or complete failure. Look for loose wires, burnt insulation, or broken conductors.
Remake Connections Properly: Transfer wires from back-stab connections to side-screw terminals. Form a hook in the wire end, wrap it clockwise around the screw, and tighten securely. This method provides far more reliable long-term performance.
Identify Heat Damage: Charred insulation, melted plastic, or discolored components indicate serious problems. If you discover heat damage, stop immediately and schedule a professional inspection. The issue extends beyond the switch itself and may involve overloaded circuits or dangerous wiring conditions.
Test Internal Contacts: Even with good connections, switch mechanisms wear out. If contacts feel mushy, gritty, or show no resistance when toggled, replacement is necessary.
Why Do Dimmers Fail With LED Bulbs?
Older dimmers designed for incandescent bulbs often malfunction with LED lighting, causing flickering, buzzing, failure to turn on, or inability to dim to low levels. Installing LED-compatible dimmers solves these compatibility issues.
Modern lighting technology requires modern controls:
Match Dimmer to Load Type: LED-rated dimmers handle the electronic circuitry inside LED bulbs that older dimmers can’t manage. Check packaging for “LED compatible” or “CFL/LED” designations.
Verify Minimum Load Requirements: Many dimmers require minimum wattage that LED bulbs don’t reach. Low-load or no-minimum-load dimmers accommodate energy-efficient lighting.
Check Bulb Compatibility Lists: Quality LED manufacturers publish lists of approved dimmers. When problems persist after installing an LED-rated dimmer, verify your specific bulb model works with that dimmer.
Consider Smart Dimmer Requirements: Some smart dimmers require neutral wires that older switch boxes may lack. Choose no-neutral models for retrofit applications or have an electrician add neutral conductors.
How Do You Troubleshoot 3-Way Switch Circuits?
When lights controlled by multiple switches malfunction, identify which switch location fails, mark the common wire before removal, replace one device at a time, and verify travelers connect to brass screws while commons connect to darker screws. Systematic replacement prevents confusion.
Multi-location switching adds complexity but follows predictable patterns:
Document Before Disassembly: Take clear photos of wire connections before removing any device. Mark the common wire with tape—it’s typically connected to a darker or labeled screw.
Replace Systematically: Start with the switch exhibiting loose toggles, grinding sounds, or heat. Test after each replacement rather than changing multiple devices simultaneously.
Understand Traveler Wiring: The two traveler wires carry power between switches and connect to brass-colored screws. Crossing travelers or swapping them with the common creates inoperative circuits.
Diagnose By Behavior: Lights that only work from one location suggest a failed switch at the non-functional location. Lights that only work with switches in certain combinations indicate crossed or miswired travelers.
What Special Concerns Apply to Older Chicago Homes?
Homes built in the late 1960s and early 1970s may contain aluminum branch wiring that expands and contracts differently than copper, loosening connections over time and creating fire hazards. Professional evaluation ensures safe, code-compliant repairs.
Vintage Chicago bungalows, two-flats, and older homes present unique challenges:
Aluminum Wiring Recognition: Aluminum conductors appear silver-colored rather than copper’s characteristic orange-brown. Connections may show white or gray oxidation.
Specific Symptoms: Warm switch plates, intermittent operation, or burning odors suggest failing aluminum connections. These require immediate professional attention.
Required Solutions: Use only CO/ALR-rated devices designed for aluminum wiring, or install approved copper pigtails with proper connectors. This specialized work requires training and experience beyond typical DIY capabilities.
Mixed Wiring Methods: Many older Chicago homes combine knob-and-tube, cloth-insulated, and modern romex wiring. Professional electrical repairs during switch replacement often uncover other aging connections before they fail.
When Should You Call a Licensed Electrician?
Contact a professional electrician immediately if breakers trip repeatedly, you smell burning odors, see scorch marks, discover aluminum wiring, find damaged electrical boxes, or feel uncertain about which breaker controls the circuit. These conditions indicate hazards beyond safe DIY troubleshooting.
Some situations always require professional expertise:
Persistent Breaker Trips: Breakers that trip immediately after reset or trip repeatedly signal short circuits, ground faults, or overloaded circuits that need diagnostic equipment and expertise to resolve safely.
Burning Smells or Visible Damage: Any burnt smell, scorch marks, or buzzing sounds from switches or panels indicate active electrical hazards requiring immediate professional intervention.
Aluminum or Cloth-Insulated Wiring: These older wiring methods demand specialized knowledge and proper materials for safe repairs. Improper techniques create serious fire risks.
Uncertainty About Procedures: If you can’t confidently identify the correct breaker, feel uncomfortable working around electricity, or encounter unexpected conditions, calling a professional protects both you and your home.
Electric Work Force Inc. offers same-day and 24/7 emergency electrical service throughout Chicago and surrounding suburbs. Safety always comes first.
What Is the Professional Diagnostic Process?
Licensed electricians follow systematic diagnostic procedures using professional-grade testing equipment to identify root causes rather than symptoms, ensuring repairs address actual problems instead of temporarily masking issues.
When you call Electric Work Force Inc., expect this proven approach:
Immediate Safety Assessment: Technicians identify and address any immediate hazards protecting occupants before beginning diagnostic work.
Advanced Testing: Professional multimeters, circuit analyzers, and thermal imaging cameras pinpoint problems that visual inspection might miss—loose connections creating heat, voltage drops indicating resistance, or circuit loading issues.
Quality Repairs: We use premium materials meeting or exceeding electrical code requirements, ensuring repairs last and function safely for years.
Transparent Communication: You receive clear explanations of findings, options for repair, and upfront pricing before any work begins. No surprises, no pressure.
Complete Verification: After repairs, we test the entire circuit, check panel connections, and verify proper operation to prevent repeat failures.
How Can You Prevent Future Switch Problems?
Regular maintenance including LED-compatible dimmers, side-screw wire connections, periodic panel inspections, monthly GFCI testing, and load assessments when adding high-draw appliances dramatically reduces switch failures and electrical issues.
Simple preventive habits save money and improve safety:
Use Appropriate Dimmers: Install LED-rated dimmers for any LED lighting installation to prevent compatibility failures and extend component life.
Upgrade Connection Methods: When replacing switches, always use side-screw connections rather than back-stab terminals for reliable long-term performance.
Schedule Panel Inspections: Every 3-5 years, have a licensed electrician inspect your electrical panel for rust, overheating, loose lugs, and other developing issues before they cause failures.
Test GFCI Protection Monthly: Press TEST then RESET on bathroom and kitchen GFCIs to verify proper operation. Failed GFCIs provide no protection against electrocution.
Assess Electrical Loads: Before adding space heaters, window air conditioners, or other high-draw items, request a load assessment to determine if your circuits can safely handle additional demand.
Step-by-Step: Safely Replacing a Single-Pole Switch
For homeowners comfortable with basic electrical work and possessing proper tools:
Required Tools: Non-contact voltage tester, insulated screwdriver, needle-nose pliers, wire strippers, new switch, flashlight or headlamp.
Procedure:
- Turn off the circuit breaker and verify power is completely off using your voltage tester
- Remove the cover plate and unscrew the mounting screws holding the switch in the box
- Gently pull the switch forward—photograph wire positions for reference
- Disconnect wires and transfer them to corresponding terminals on the new switch
- Form hooks in wire ends and wrap clockwise under terminal screws, tightening securely
- Attach the ground wire to the green grounding screw
- Fold wires neatly into the box and reinstall the switch
- Restore power and test operation
If the switch still doesn’t work after replacement, the problem lies elsewhere in the circuit. Schedule a diagnostic visit rather than continuing to replace components.
Why Choose Electric Work Force Inc. for Switch Repairs?
Chicago-area homeowners trust Electric Work Force Inc. for several compelling reasons:
Licensed and Insured Expertise: Our electricians maintain proper licensing across all Chicago suburbs we serve, backed by comprehensive insurance protecting you and our team.
Family-Owned Since 2015: We’ve built our A+ BBB rating and 4.9-star Google reviews by treating every home like our own.
Diagnostic-First Philosophy: We identify and fix root causes rather than symptoms, preventing recurring problems and saving you money long-term.
Premium Materials and Warranties: Quality components and strong repair warranties ensure lasting results you can trust.
Comprehensive Services: From simple switch repairs to complete panel upgrades and rewiring, we handle all residential and commercial electrical needs.
Key Takeaways
- Always verify power is off using a non-contact voltage tester before touching switches or wiring
- Test the obvious first: Replace bulbs and check fixtures before assuming switch failure
- Check for tripped breakers and GFCI outlets that can disable switches without obvious signs
- Back-stabbed wire connections are frequent failure points requiring replacement with side-screw terminals
- LED bulbs require LED-compatible dimmers to function properly without flickering or failure
- 3-way and 4-way circuits demand systematic troubleshooting and proper traveler identification
- Aluminum wiring and vintage systems require professional evaluation and specialized repair techniques
- Heat damage, burning smells, and persistent trips always warrant immediate professional service
- Preventive maintenance including regular testing and proper device selection prevents most switch problems
- Professional diagnostics save time and money by identifying root causes accurately
Trust Professional Electricians for Reliable Results
Understanding effective troubleshooting & repair tips empowers you to identify simple electrical switch problems and determine when professional help becomes necessary. While homeowners can safely handle basic switch replacements following proper procedures, complex issues, safety concerns, and code compliance requirements often demand licensed expertise.
Electric Work Force Inc. serves homeowners throughout Naperville, Downers Grove, Westmont, Lisle, Darien, Woodridge, Hinsdale, Clarendon Hills, Oak Brook, and all Chicago suburbs with reliable, code-compliant electrical services. Our family-owned company brings over nine years of experience, diagnostic-first problem solving, and genuine commitment to customer safety and satisfaction.
Whether you need a simple switch replacement, comprehensive electrical troubleshooting, or complete system upgrades, our licensed electricians provide the expertise and transparent service your home deserves.
Call Electric Work Force Inc. today at (708) 968-1904 or fill out the contact form to schedule same-day service. Mention our current promotions for special savings on electrical repairs and upgrades. Keep your home safe, code-compliant, and powered reliably with Chicago’s trusted electrical professionals.